Part 1: v17.04.27 wiTECH download link:
Part 2: How to install wiTECH MicroPod 2 v17.04.27 software crack:
Part 3: How to use MicroPOD II clone for auto key programming
Part 4: How to fix wiTech MicroPod 2 V17.04.27 is not registered
Part 5: Costomer Feedback
Part 6: wiTECH MicroPod II 2 setup instruction
Part 7: How to downgrade Micropod ii Witech?
Chrysler, Jeep, Dodge diagnostic VCI interface wiTECH MicroPod 2 software updated!! here, free download wiTECH software v17.04.27 and get the how-to’s of wiTECH 2 app installation to install Chrysler wiTECH software yourself! Also, a wiTECH MicroPod 2 v17.04.27 user manual of key programming is attach here for you.
Part 1: v17.04.27 wiTECH download link:
https://mega.nz/#!Nm5QRQYR!fVPAE7SNtYa2iE5eqQaZ1zyW7A1nh94-vPGpK1Iu3lg
It’s wiTECH software crack
No need password for wiTECH MicroPod 2 login
No need wiTECH software license
Tested OK
Safe to use with wiTECH MicroPod 2 clone (item no. SP271-C only)
Operation system of wiTECH 2 download:
Windows XP;
Windows 7
THE MOST IMPORTANT NOTES:
The date of the computer must be the same as the fact
The computer must be connected to the Internet
Connect the machine to the MicroPod 2 to open the wiTECH software
The system may ask you to turn off the software and turn it on for registration again. Repeat it for several times. Then you can use it normally
Part 2: How to install wiTECH MicroPod 2 v17.04.27 software crack:
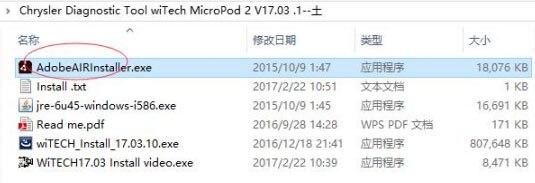
Step 1 install AdobeAIRInstaller.exe
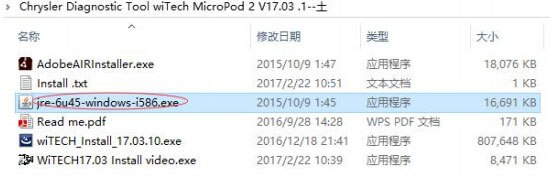
Step 2 install jre-6u45-windows-i586.exe
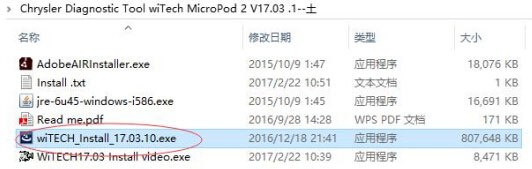
Step 3 install wiTECH_Install_17.04.27.exe
Step 4 Restart the computer
wiTECH diagnostic tool is ready for use!
Part 3: How to use wiTech MicroPod II clone for auto key programming
Step 1
Plug the MicroPOD II device into the OBD port and connect the USB cable from the device to your laptop. This wakes the BUS on the car.
Step 2
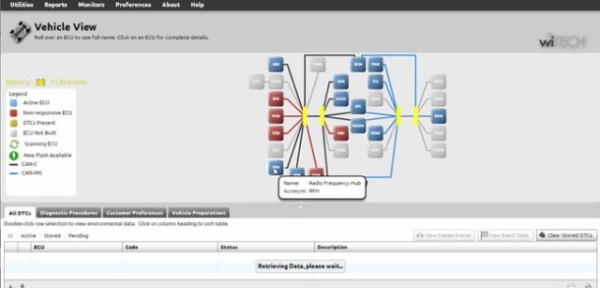
Manually enter the VIN of the vehicle. This gives you access to the module list. Select the RFH (Radio Frequency Hub) module. This is the module where the key is registered.
Step 3
Next select “Miscellaneous Functions,” then “Program Ignition Fobix.” At this point, you are prompted to enter the VIN again, followed by the four-digit PIN Code.
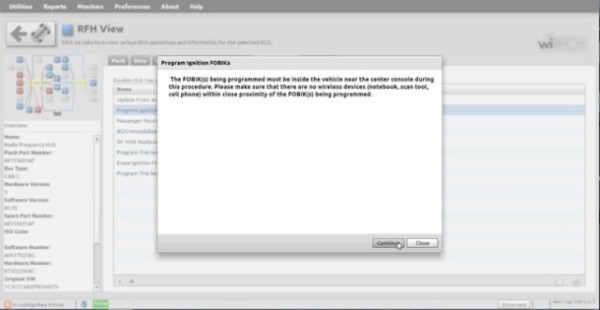
Step 4
After the four-digit pin is entered you are prompted to hit continue to “Program Ignition FOBIK.” Once you hit continue you must press the UNLOCK button on the FOBIX within 30 seconds (the FOBIX needs to be located near the center console during this procedure).

Step 5
Programming of the Ignition FOBIX is now successful. The new key key is accepted into the car, and the ignition will now turn on and start the car. At this point, you also have the option to program a second key.
Part 3: How to use MicroPOD II clone for auto key programming
Step 1
Plug the MicroPOD II device into the OBD port and connect the USB cable from the device to your laptop. This wakes the BUS on the car.
Step 2
Manually enter the VIN of the vehicle. This gives you access to the module list. Select the RFH (Radio Frequency Hub) module. This is the module where the key is registered.
Step 3
Next select “Miscellaneous Functions,” then “Program Ignition Fobix.” At this point, you are prompted to enter the VIN again, followed by the four-digit PIN Code.

Step 4
After the four-digit pin is entered you are prompted to hit continue to “Program Ignition FOBIK.” Once you hit continue you must press the UNLOCK button on the FOBIX within 30 seconds (the FOBIX needs to be located near the center console during this procedure).
Step 5
Programming of the Ignition FOBIX is now successful. The new key key is accepted into the car, and the ignition will now turn on and start the car. At this point, you also have the option to program a second key.

Things to Remember:
You must be online to program the key.
The PIN Code is only good for one session, which lasts 72 hours. After 72 hours the pin code expires.
If you input the wrong code for three-time it locks the BCM and you cannot service the vehicle for 24 hours.
The key is one-time programmable. Once married to the vehicle it is locked to the car forever. The key can be erased from the car and put back into the same car, but can’t be switched to another car.
The placement of the key during initialization is important. It needs to be placed either behind the shifter or in the center console.
Part 4:How to fix wiTech MicroPod 2 V17.04.27 is not registered
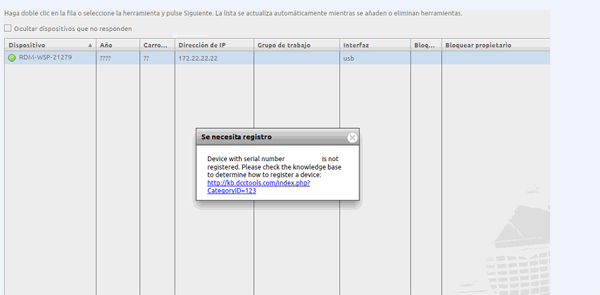
Issue:
“Registration is needed
Device with serial number*** is not registered. Please check the knowledge
base to determine how to register a device”
Working Solution:
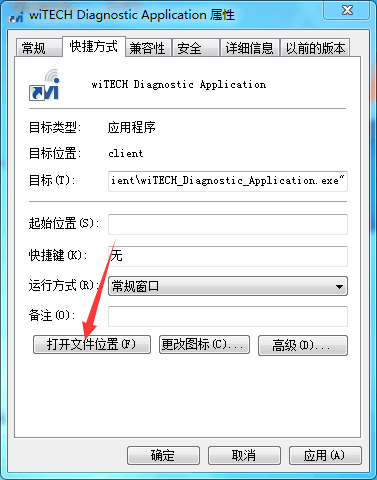
1. Right click Witech Diagnostic Application-> Properties->Open file location
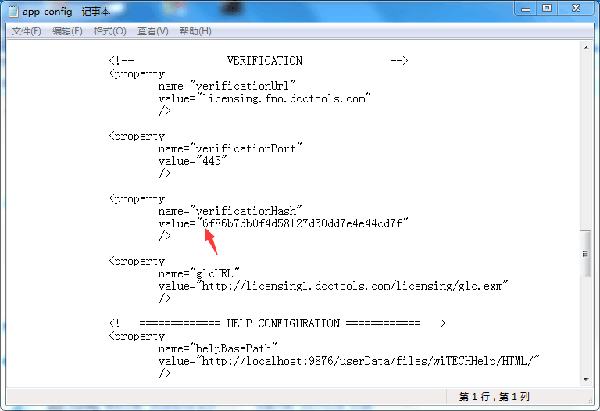
2. Enter C:/Program Files (x86)/DCC Tools/wiTECH/client. Open app-config text file

3. Find out “VerificationHash”, then the followed “Value”, change the first number to any value i.e change 6 to any number between 1-9.
Then save the text file. (Very important!!!)
Run Witech Micropod II software.
If it still display message” an internal registration error has occurred “, just close this windows to ignore it.
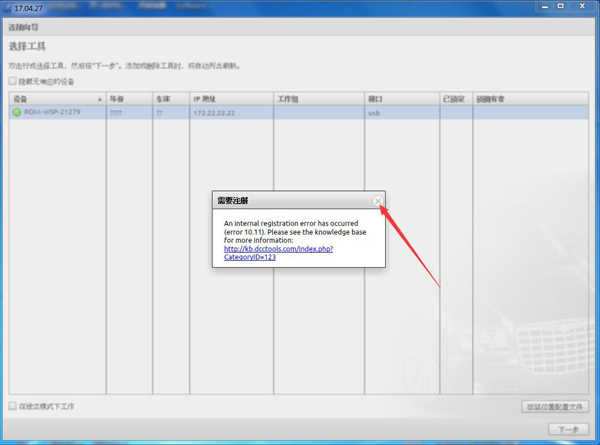
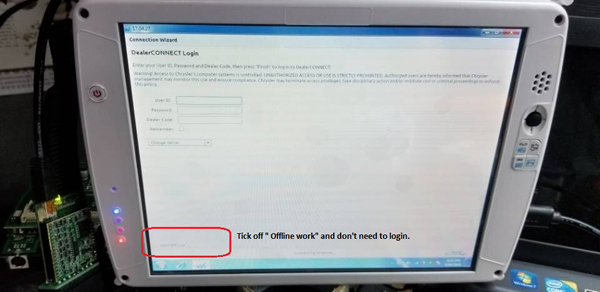
Tick off ” Offline work” at the left corner of screen, then you don’t need to login.
Click on “Finish”.
Problem Fixed.
Go on using wiTech MicroPod 2 to diagnose or program Chrysler.
Part 4:Costomer Feedback
I bought my miocropod 2 clone from OBD2TOOL, same as what Radius bought. It came with a hard drive that is barely working. Its making beeping sounds and clicking and on its very last legs. I was able to make a backup though and there is actually a second partition on it with an Acronis backup image already created from 8/15/17. Anyway I will have to contact the seller and arrange for some discount since the hard drive is virtually useless.
Anyway, the main thing is that the miocropod 2 had the required circuits etc, and the DRB3 works after following most of Radius’s instructions. I had to change it up since I did follow his instructions exactly, but the flexnet update didn’t work, and so it failed and the drb3 did not work.
In order to get it to work, I had to change the date. In the beginning when installing the stubs, his directions had already instructed you to change the date to 1/1/17, then navigate to the folder and install the three stubs. Reboot. Try to use flexnet connect to update but it failed. Windows update also errored because of the wrong date. So I changed the date to the correct date. Now flexnet connect worked and I was able to update K-line and enhanced drb3. As soon as both had updated, I disconnected internet and then changed date back to 1/1/17. Then I followed the rest of the instructions. Plugged in the pod, waited for windows to see it and make the virtual network, and then launched wiTech. Launched enhanced drb3. Success!! It works!!
So the instructions are good, but at least for me, I had to fix the date to the correct date to get the flexnet updates. Once updated, disconnect the internet and change the date back to 1/1/17 for it to work.
The device I purchased is an OFFLINE ONLY version of micropod 2, but I only use it for diagnostics, not for programming as I do not have a TechAuthority account. So if you need one for online use this is not the unit to buy.
These are the steps I followed to get Enhanced DRB III Emulator to work:
1: Make a backup copy of the partition from the hard drive included with the micropod!
2: Install HDD in laptop
3: Set date to 01/01/17 BEFORE booting from laptop
4: Boot to HDD
5: Allow windows to install drivers, etc, as needed for your laptop and reboot as needed.
6: Once all of that is done, do NOT run WiTech yet!
7: Turn OFF internet!
8: Navigate to C:\ProgramData\wiTECH\jserver\data\core\stubs
9: Install DRB Emulator stub
10: Install DRB Enhanced emulator stub
11: Install K-Line stub
12: Reboot computer
13: Set date back to current date
14: ALLOW internet access
15: Run Flexnet software updater. Do NOT update WiTech!!!
16: Flexnet will find updates for enhanced DRB and K-Line
17: Install K-Line update first
18: Install Enhanced update next.
19: Turn date back to 01/01/17!
20: Once updates and downloaded and installed, turn OFF internet and NEVER turn on again!
21: Reboot computer
22: Attach Micropod to car. When green LED turns on, turn on car ignition
23: Attach USB cable to PC and Micropod
24: When Windows is done installing drivers, etc, you should show a network connection in the tool tray with no internet access
25: Run Wi-Tech
26: Press “Launch DRB III” button in lower right hand corner
27: Accept EULA
28: DRB Emulator will launch.
29: Enjoy.
UPDATE:
I already tested it on a 2010 Charger under witech and works flawlessly, and got a 2004 Dodge pickup and under the emulator worked perfectly. I already called my locksmith, who drives an 04 Sprinter to try it as well.
Part 6 :wiTECH MicroPod II 2 setup instruction
If your dealership purchased a new microPOD and you would like to convert your existing microPOD for using with wiTECH 2.0 System, you need to download and install the microPOD Setup Utility to configure/setup your microPOD for wiTECH 2.0.
NOTE: microPODs with a serial number beginning with “WFP” should NOT be used with this utility.
PROCEDURE
If you have a restricted network, you must first make sure that all sites listed below are enabled to be able to successfully use microPOD Setup Utility and the wiTECH 2.0 System.
mixpanel.com
bugsnag.com
fcawitech.com
chrysler.com
dealerconnect.com
jeep.com
witechsystem.com
Note: Please disable any Anti-Virus software that you have on your computer in order to allow the microPOD Setup Utility to install and run properly.
How to download and install the microPOD Setup Utility
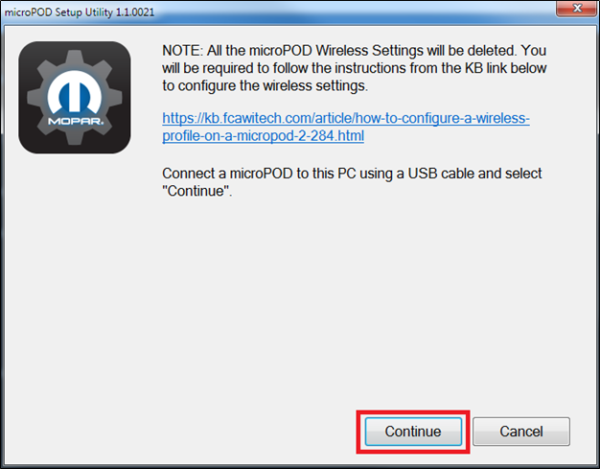
IMPORTANT: Once the microPOD is configured using the microPOD Setup Utility, all the microPOD Wireless Settings will be deleted. You will be required to follow the instructions from the KB link titled “How to configure a Wireless Profile on a microPOD II”.
To download the application, please login to DealerCONNECT > Service > wiTECH Information > microPod Setup Utility
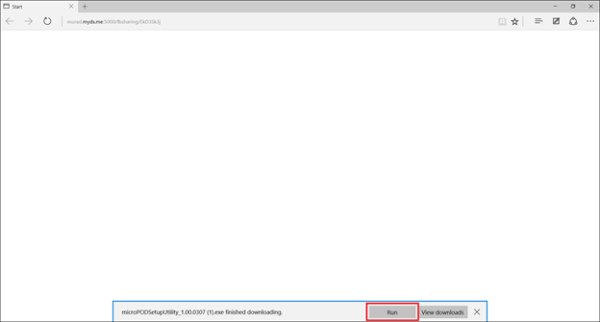
Step 1
Click on “Run” to begin the downloading process of microPOD Setup Utility.
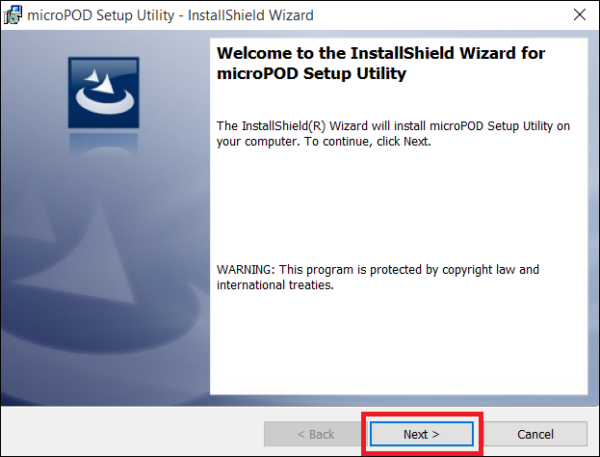
Step 2
The install wizard will appear to install the wiTECH Driver x64 onto your computer if your PC has not been installed with wiTECH 1.0 application.
If the PC has been installed with wiTECH 1.0 App, you will not see the screen below and proceed to Step 6. Otherwise, click “Next” to proceed.
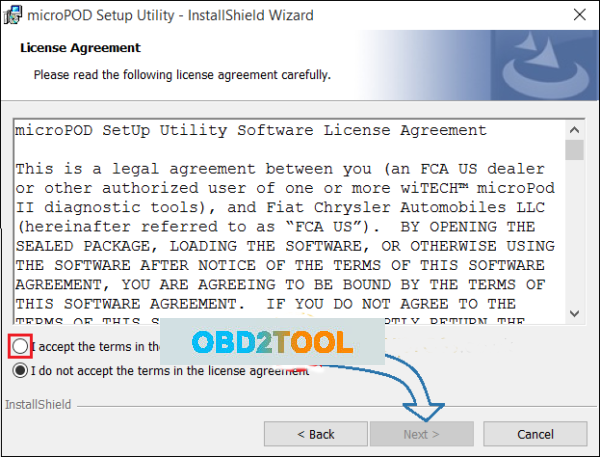
Step 3
Read the License Agreement carefully, and accept the terms in the license agreement. Then, click “Next” to continue.
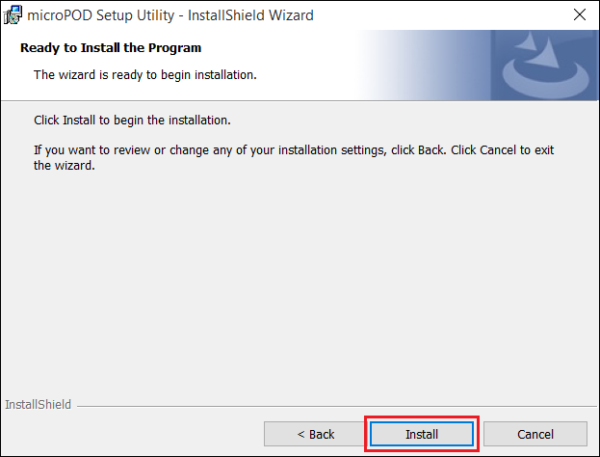
Step 4
You are now ready to start the actual installation of the driver. You now need to click on “Install” for it to start.
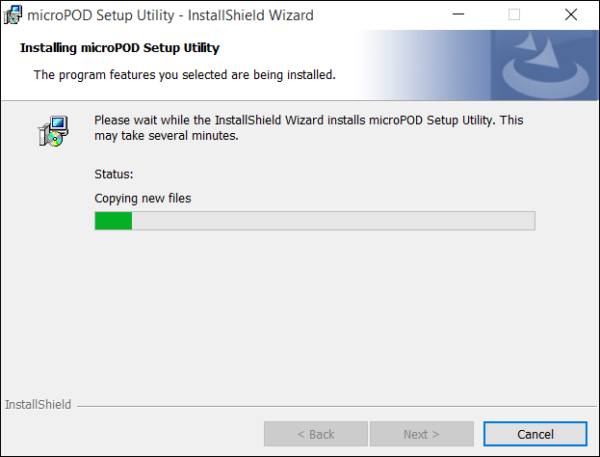
Step 5
This will now install the wiTECH Driver x64. Once complete, the program will automatically proceed to the next step.
Step 6
Once the installation has completed, click “Finish”. Proceed to the following section, “Using the microPOD Setup Utility”.

Using the microPOD Setup Utility
NOTE: Please make sure that your computer is connected to the internet and the microPOD is connected to the computer via USB before starting this process. This application will help you configure your microPOD for wiTECH 2.0.
Step 1
Start microPOD Setup Utility by clicking the icon on the desktop:
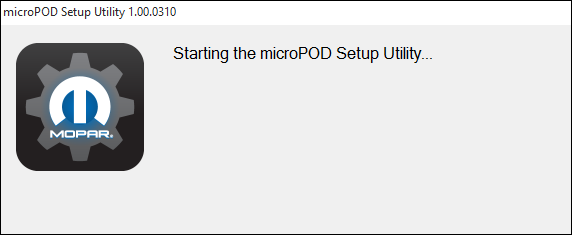
If the microPOD Setup Utility that is installed is out of date, you will be forced to update to the newer version of the application.
Step 2
Please make sure your microPOD is connected to the PC via USB.

Step 2a
If you see the following screen you may not be connected to the internet, or have a firewall that blocks 1 or more of these websites.
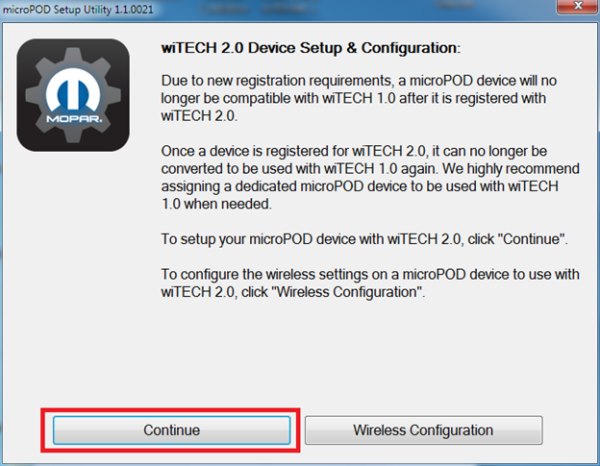
Select “Continue” on the next screen for wiTECH 2.0 Device Setup and Configuration.
NOTE: If you only want to configure the wireless setting on a microPod device to use with wiTECH 2.0, click “Wireless Configuration” and follow instructions.
Select “Continue” on the next screen to begin attempting to connect to the microPOD device.

Step 3
Once your microPOD II is recognized by the utility, select “Continue” to proceed with the configuration.
NOTE: microPODs with a serial number beginning with “WFP” should NOT be used with this utility.
Step 3a
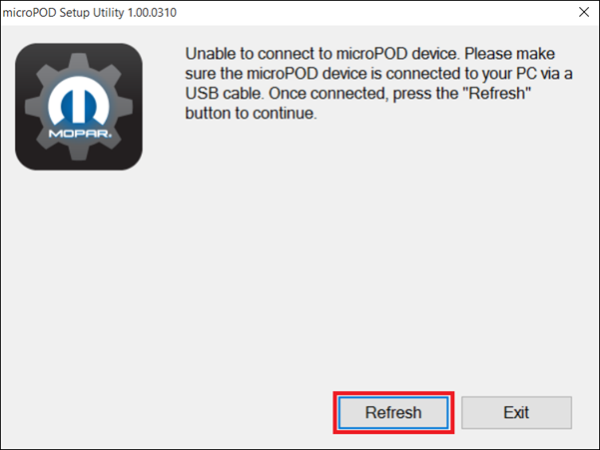
If the utility does not find the microPOD device, please assure that the microPOD is connected via USB and click “Refresh”.
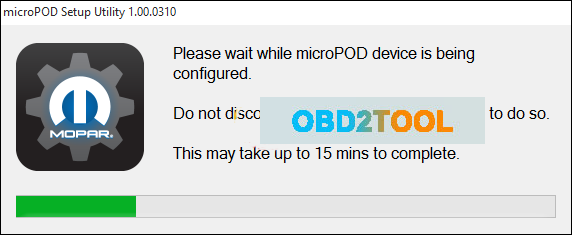
Step 5
The following screen will appear for up to 15 minutes while the microPOD device is being configured.

Step 6
The following screen will appear when the utility completed the configuration of microPOD for wiTECH 2.0 Application.
Note: After microPOD Setup Utility is ran, all existing wireless networks will be removed from the microPOD.
Important! Leave the microPod Setup Utility window running as you will be required to complete software updates to the microPod device before configuring the wireless.
Step 6a
Login into wiTECH 2.0. The microPOD II that was just configured using the microPOD Setup Utility should appear in the wiTECH 2.0 discovery. You will need to update the operating system of your microPOD II before it can be used with wiTECH 2.0. Click “Continue”, and your web browser will redirect you to the page to download and install the operating system update as seen in the following step.
*NOTE: If microPOD II does not show up in discovery after a couple of minutes please power cycle your microPOD II by unplugging it and plugging it back in.
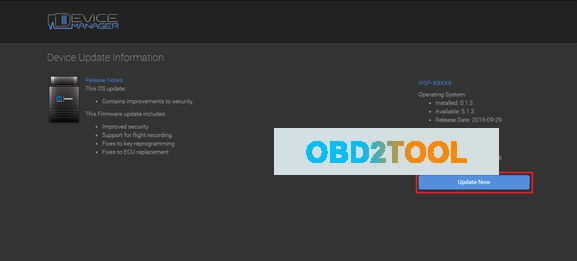
Step 7
Click “Update Now” and your microPOD II should continue to the update screen. Once updating, do not interrupt your microPOD II at any point until the update is complete.
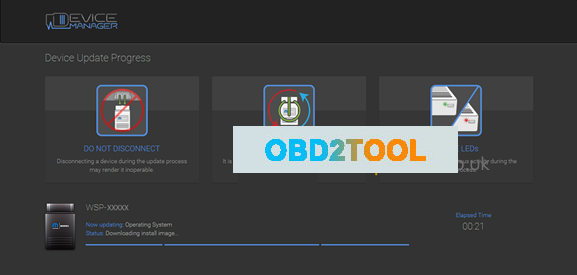
*NOTE: This can take upwards of 9 minutes. It is normal activity for the microPOD II to reboot.
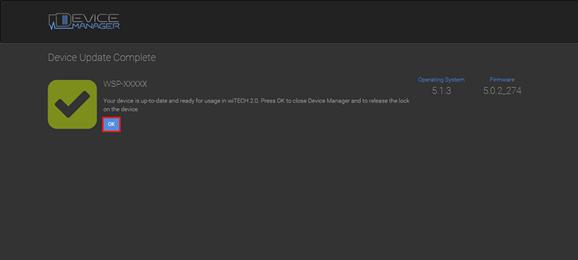
Step 8
Click “OK” and you will be navigated back to the wiTECH 2.0 discovery page. Your microPOD II should appear updated and ready for use.
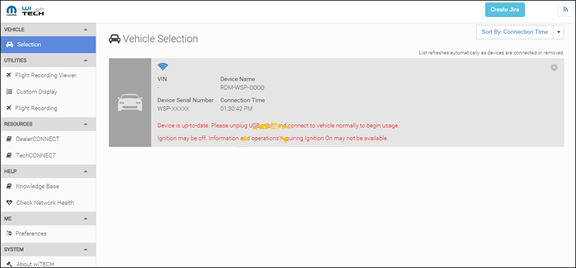
Step 9
With the microPod Setup Utility still running, configure wireless on the wiTECH microPod 2 device.
Enjoy!
BIG THANKS to the one who shares the wiTECH microPod 2 setup manual!!!
Part 7 :How to downgrade Micropod ii Witech?
The answer is it’s not possible to downgrade if using micropod ii clone .
downgrade is not a simple process and sometimes bad quality clone may be lost.
downgrade is needed in next situations:
return from witech 2 to witech 1.
make vci pod/micropod compatible with cda.
if micropod setup utility failed during update.
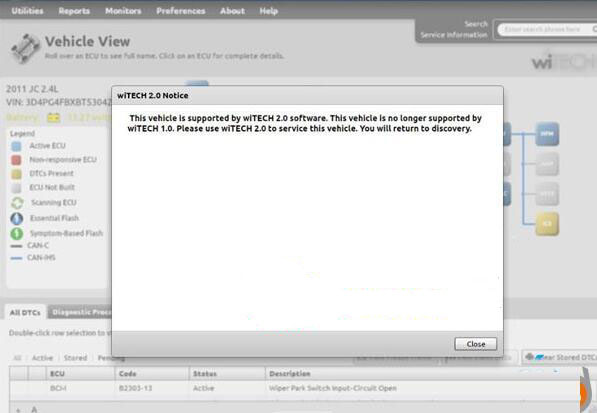
Supposing your got Witech 2.0 warning:
“This vehicle is supported by wiTECH 2.o software. This vehicle is no longer supported by wiTECH 1.0. Please use wiTech 2.0 to service this vehicle. You will return to discovery. ”
Wrong solution:
To update to wiTECH 2.o software from wiTECH 1.o
You may think you have online account and tried to update, actually it will have risk of being locked by Chrysler server or you can’t downgrade anymore.
Correct solution offered by www.obd2tool.com engineer:
Option 1:
Remove new version V17.04.27, download and install lower version witech 17.03.10.
Free download witech 17.03.10
https://mega.nz/#!BNAjnAQB!AWiM7QTImGt5n0XvgqNLF6rZ87gFQ4GqC9rl4dOtYcY
Option 2:
Reinstall the computer operating system, and install wiTech V17.04.27 software again.
Free download wiTech V17.04.27 software.
https://mega.nz/#!Nm5QRQYR!fVPAE7SNtYa2iE5eqQaZ1zyW7A1nh94-vPGpK1Iu3lg
Good luck!
Leave a Reply