Follow the steps below and refer to the follow picture, which illustrates the typical Tech 2 Scan Tool connection to a computer terminal.
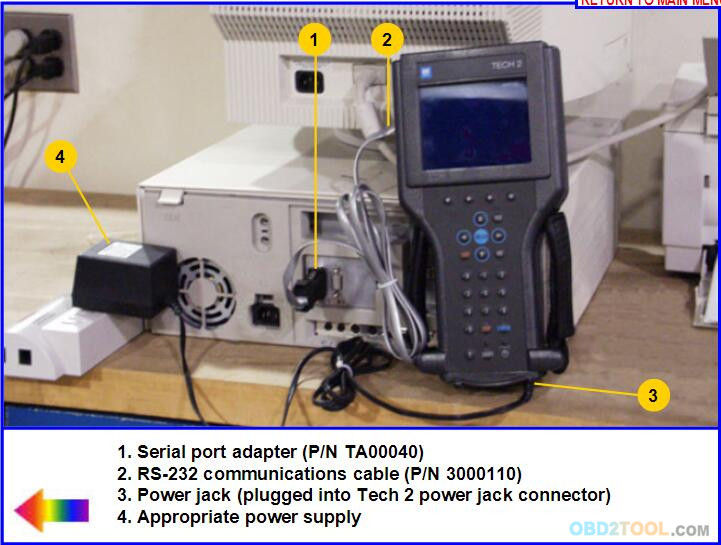
1. Plug the serial port adapter (P/N TA00040) into the serial port marked “A” or “1” on the back of the computer terminal or to the USB port using the USB serial adapter.
2. Plug the Tech 2’s RS-232 cable into the serial port / USB port adapter and connect the appropriate power supply.
3. After power is supplied to the Tech 2 and the [PWR] button is pressed, the Car Scanner Tech 2 start-up display
should appear on the Tech 2 screen.
Power Supplies
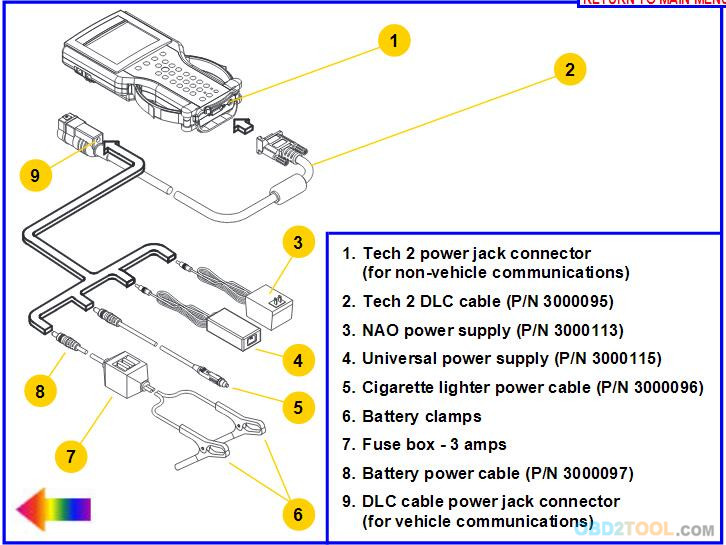
Power up the Tech 2 using either:
* The power jack connector at the bottom of the Tech 2 unit, or
* The DLC cable power jack connector behind the area where various DLC adapters are connected.
For non-vehicle communications, connect power source to either location.
For vehicle communications, connect the power source to the DLC cable power jack connector only. Proper grounding may not be present if power source is connected directly to Tech 2.
When the Tech 2 is connected to the DLC of an appropriate vehicle, the vehicle battery supplies power.
When the Tech 2 from www.obd2tool.com is not connected to the vehicle’s DLC, the DLC cable power jack connector accepts power from the following:
* Cigarette lighter power cable
* Battery power cable
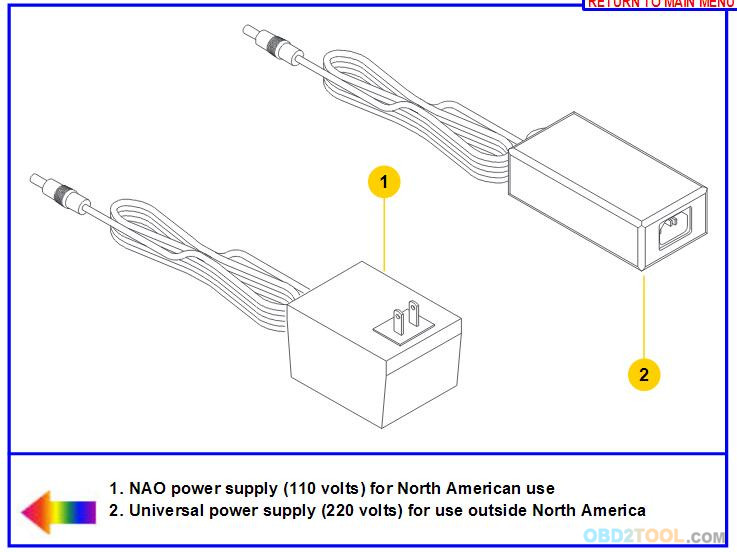
* NAO or Universal power supply
5-4
If the DLC and external power source are both connected, the power jack connection supplies current to the Tech 2. In this instance, power from the vehicle’s DLC connector is automatically disconnected from the Tech 2 internal power supply
Leave a Reply